1. Overview #
Once you switch to the Decipher Editor, you can work directly with your survey code (XML), similar to a standard code editor. This mode provides a flexible, code-based environment for advanced survey editing while maintaining access to key tools such as AI Assistant, ResearchReady, and Quotas.
To access the Decipher Editor:
- Open the Settings
 menu in the Control Area
 - Switch to Decipher Editor
2. Workspace #
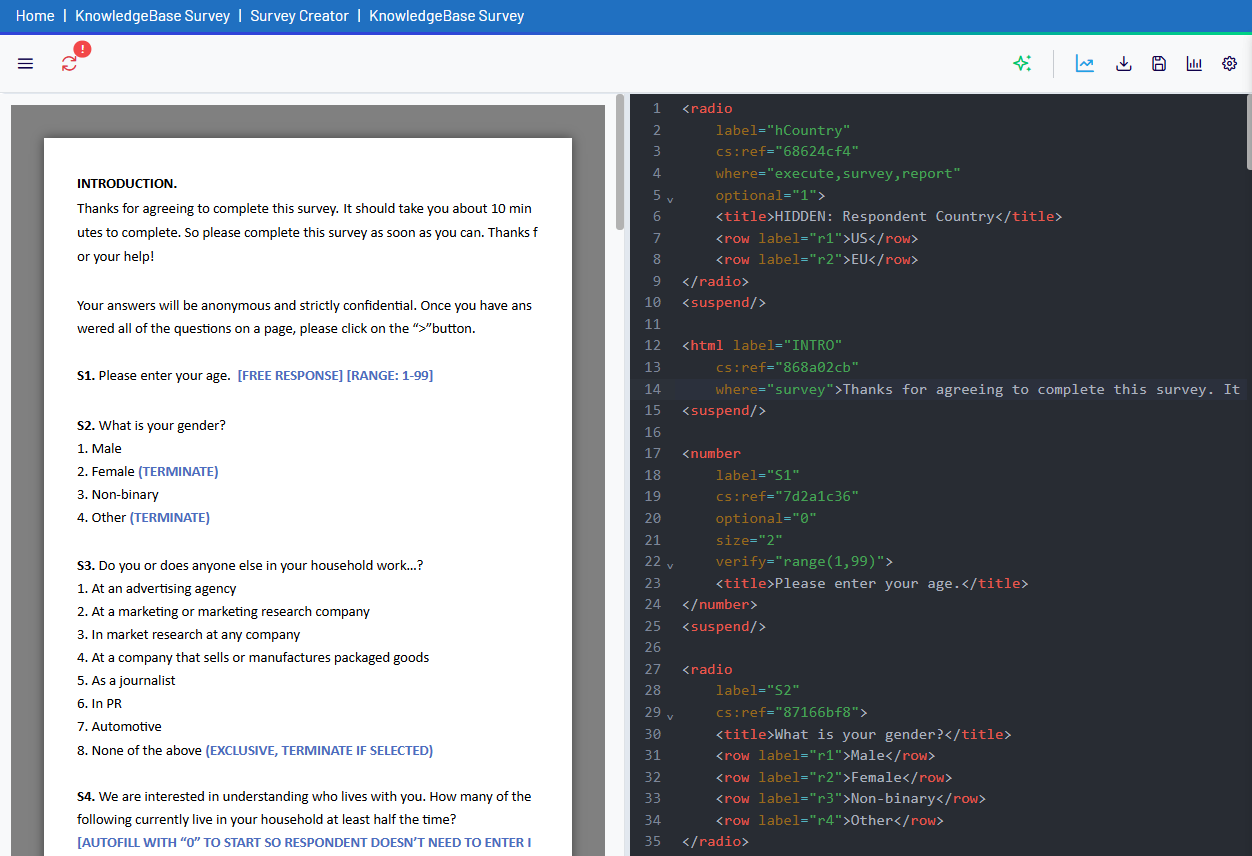
When you enter the Decipher Editor, you will see a code-based interface where you can edit your survey directly.

Key Workspace Features
- Code Editor: The main area where you can write and edit survey XML
- Show Source Toggle
 : Click the icon in the top-left corner to display the original Word questionnaire alongside the code. This allows you to review the source document and XML simultaneously
- Show Source Toggle
3. Control Area #
The Control Area in the Decipher Editor provides access to tools similar to the Classic Editor, adapted for code-based workflows.
![]()
Available Tools
- AI Assistant
 : Generate, refine, or update survey code and logic using AI
 - ResearchReady
 : Access survey analysis and validation tools
 - Export
 : Download the survey code ready for use in external platforms
 - Save
 : Save your changes
 - Quotas
 : Open the quotas manager to create, edit, import, or export quotas
 - Settings : Configure editor options and access synchronization features (see section below)
Settings
The Settings ![]() button in the Control Area opens a dropdown menu with configuration options for the editor.
button in the Control Area opens a dropdown menu with configuration options for the editor.

Available Options
- Classic Editor: Switch back to the Classic Editor
- Decipher Sync: Connect and synchronize your project with Decipher
- Template
- Change Template: Select from available company templates
- Editor Options
- Commands: View available editor shortcuts (e.g., Alt+1 to create row options)
- Import Commands: Upload your own custom command set. Note: Please contact support for assistance with importing your custom commands.
- Theme
- Choose between standard (default) and dark mode for the editor
4. Decipher Sync #
Decipher Sync allows you to connect your project directly with Decipher and keep both environments aligned. With Decipher Sync, you can seamlessly connect your project and manage changes across both platforms.
Connecting to Decipher
When you open Decipher Sync, a connection pop-up will appear.
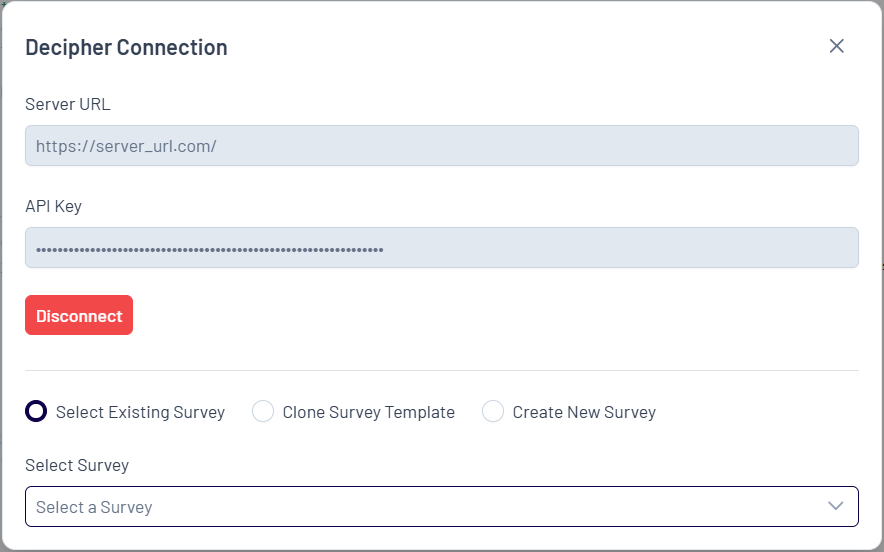
- Enter your Server URL
- Enter your API Key
- Click Connect
Synchronization Options
Once connected, you can choose how to link your project with Decipher:
- Select Existing Survey: Choose an existing survey
- Clone Survey Template: Create a survey from a template
- Create New Survey: Start a new (blank) survey
Saving and Syncing Changes
After synchronization is set up, any updates you make can be pushed to Decipher by clicking Save.
If your project is already synced and changes have been made in Decipher, you can use the Sync button in the top left corner to update your project and ensure you are working with the latest version in the editor.