Once you’ve created a survey, you’ll be taken to the Survey Editor. This is your primary workspace for building, modifying, and managing your survey.
The editor is organized into a top Control Area and a main workspace below it. The workspace includes the Survey Tree on the left, the Main Workspace in the center, and the Element Toolbar available within each element.
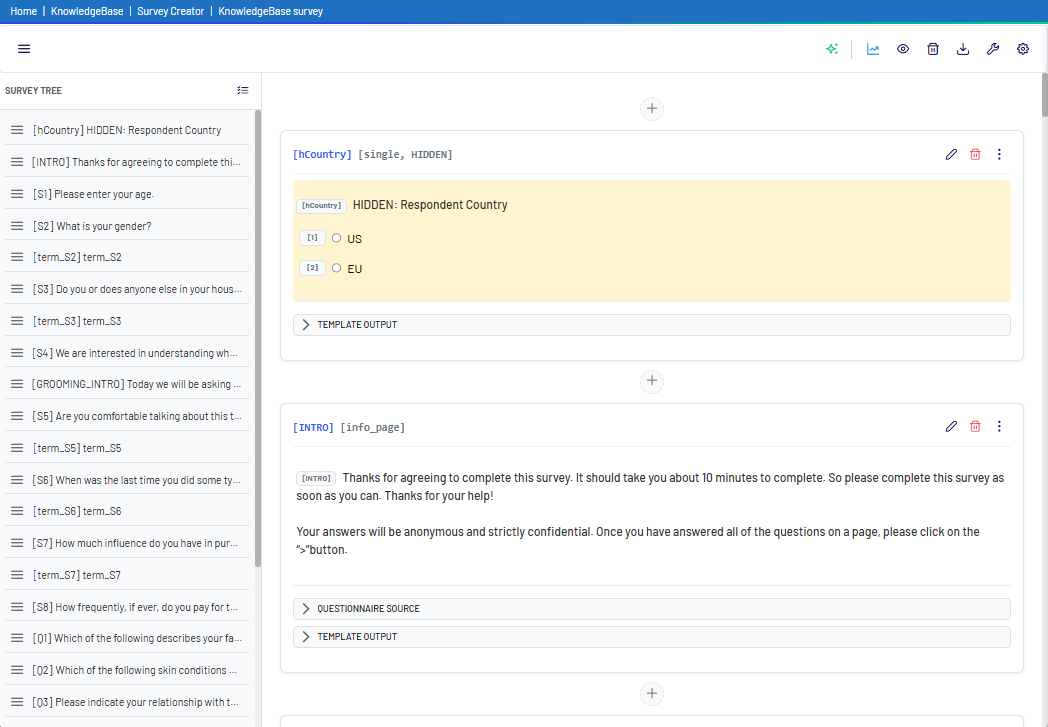
1. The Survey Tree (Left Side) #
The panel on the left displays a complete list of all elements in your survey. An element can be a question, a logic condition, a quota, or another structural item.
- Navigation: Click any element to select it and view its details in the Main Workspace.
- Reordering: Drag and drop elements to change their position in the survey.
- Bulk Edit: Select multiple elements to move or delete them simultaneously.
2. The Main Workspace (Center) #
This is where you will do most of your editing. When you select an element from the left panel, its details will appear here. Each element block contains a live preview and its configuration options.

At the bottom of each element’s block, you will find expandable sections:
- Source document: If you created the survey from a Word document, this section will display part of the original document that corresponds to this specific element.
- Output: This section shows the underlying code (e.g., XML) that the platform generates for this element. This is useful for programmers who need to integrate the survey with other platforms like Decipher.
Adding New Elements: To add a new element, click the + button between two existing elements.
3. The Element Toolbar #
In the top-right corner of every element block in the Main Workspace, you’ll find a set of tools to manage that specific element.
- Edit
 : Click this to modify the element’s content, such as question text, answer options, logic, and other properties.
 - Delete
 : Remove the element from the survey.
 - More Options
 : Access additional actions for the element:
o TrackEntry : Link the element to TrackEntry to add notes or report issues
o Duplicate : Create a copy of the element
o Change Log : View previous versions and revert changes if needed